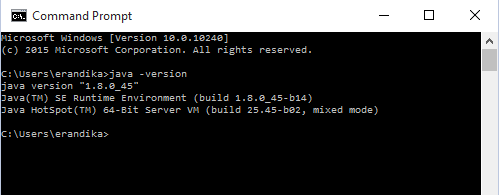
1. Make sure you have Java 1.8 or higher in your PC and it is accessible to Senuji. Please note that as of now Senuji is tested only on Windows. Therefore we are officially supporting Windows only.

2. Copy downloaded Senuji archive to your hard drive
3. Unzip the archive

4. Run Settings.jar by double click Settings.jar
5.Create a Folder for Senuji to use during execution and select the folder location as Default Folder in Settings
6. When you unzip Senuji archive you see a folder call System. Please select System folder location as System Folder in Settings
7. Create a Folder for Senuji to use as defect save location and select it as Project Save Path in Settings
8. When you unzip Senuji archive you see a folder call Driver. Select that location as Chrome Web 9.
7. Create a Folder for Senuji to use as defect save location and select it as Project Save Path in Settings
8. When you unzip Senuji archive you see a folder call Driver. Select that location as Chrome Web 9.
Driver Location in Settings. If you have
Chrome Web Driver installed Please select that location
9. When you unzip Senuji archive you see a folder call Driver. Select that location as MS Web Driver Location in Settings. If you have MS Web Driver installed Please select that location
10. Enter a Default Project name and Script name
9. When you unzip Senuji archive you see a folder call Driver. Select that location as MS Web Driver Location in Settings. If you have MS Web Driver installed Please select that location
10. Enter a Default Project name and Script name

